
DIY Cozy Reading Nook
Having a cozy place to sit and read, drink coffee, or maybe surf the internet is clutch these days when we are all spending more time at home. Follow the steps below to create a cozy nook in any corner of your home.
-
Difficulty:Beginner
-
Team:1
-
Time:1 Hour
Tools
-
Drill Bit
-
Drill
-
Level
-
Screw Drivers
-
Screws


Having a cozy place to sit and read, drink coffee, or maybe surf the internet is clutch these days when we are all spending more time at home. Follow the steps below to create a cozy nook in any corner of your home.
Seating
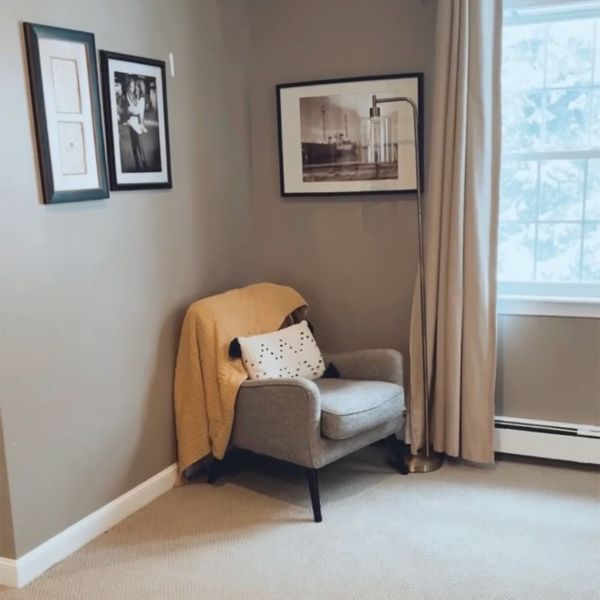
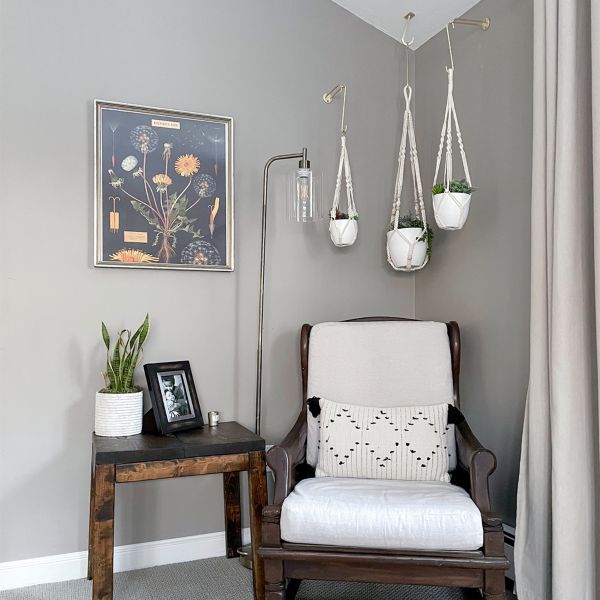
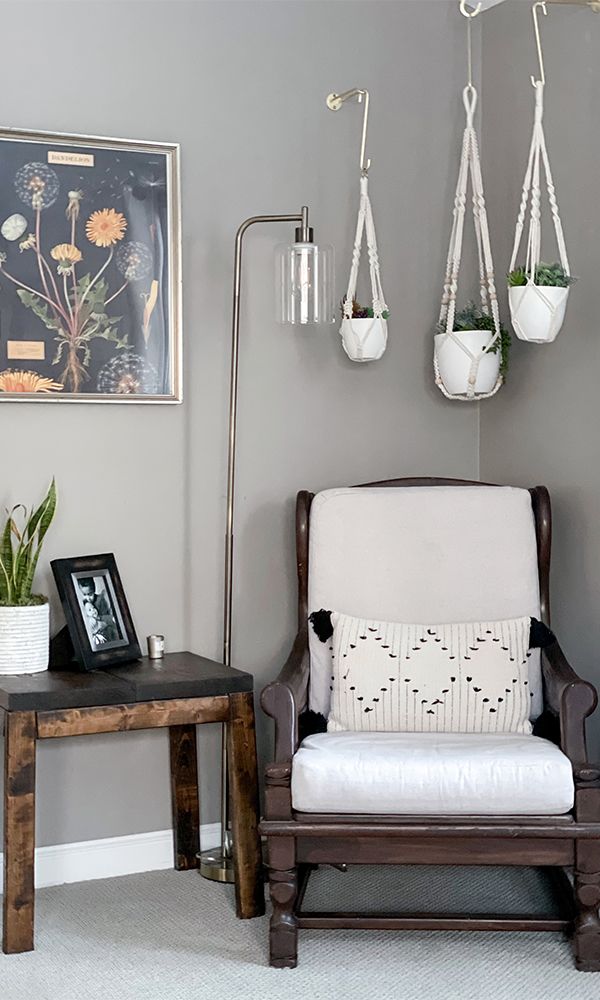
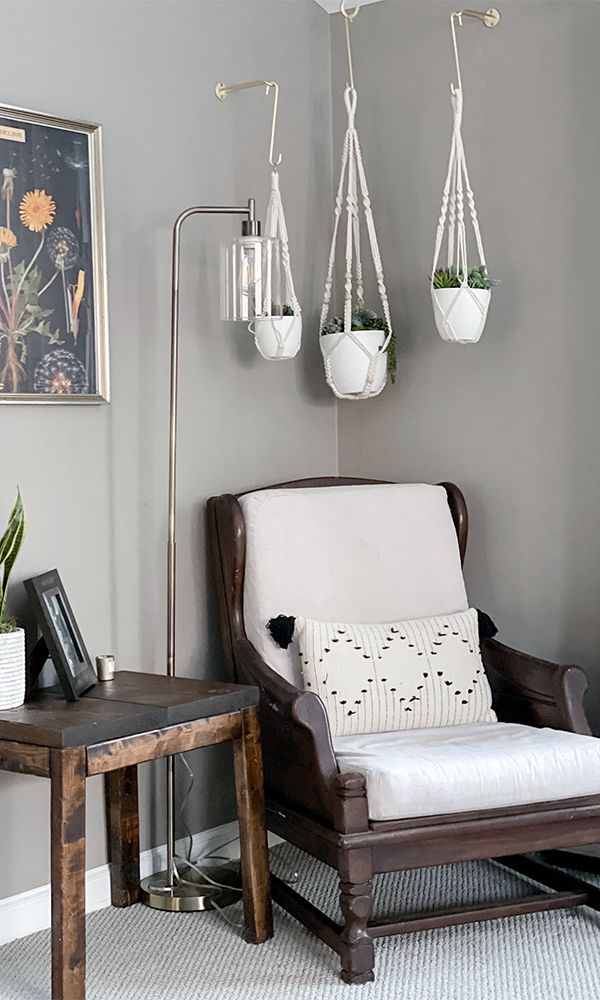
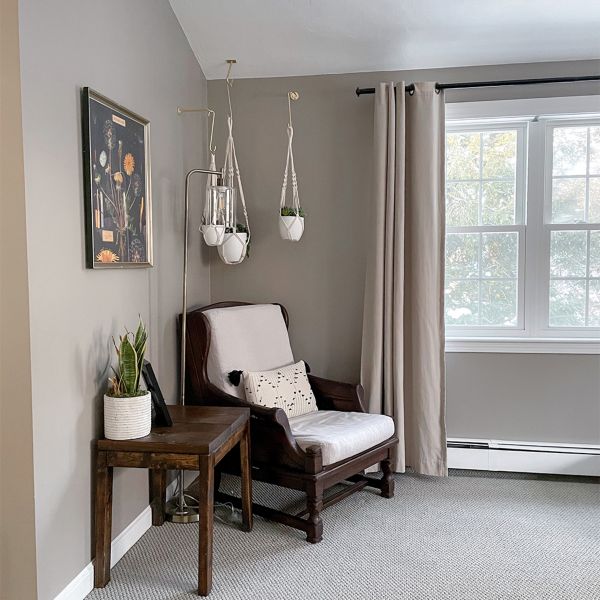
This may be obvious, but start by selecting seating. If possible, swap out a too small chair for something larger with back and arm support. It doesn’t have to be anything elaborate. Just a comfy chair with a pillow will do. Bonus points if you have a way to kick up your feet.

Add a Side Table
Pick something on the small side, just large enough to put down your book/coffee/laptop should be perfect. If you only have access to a larger side table, dress it up with a photo or a candle to make it more inviting.
Lighting
Add Decor
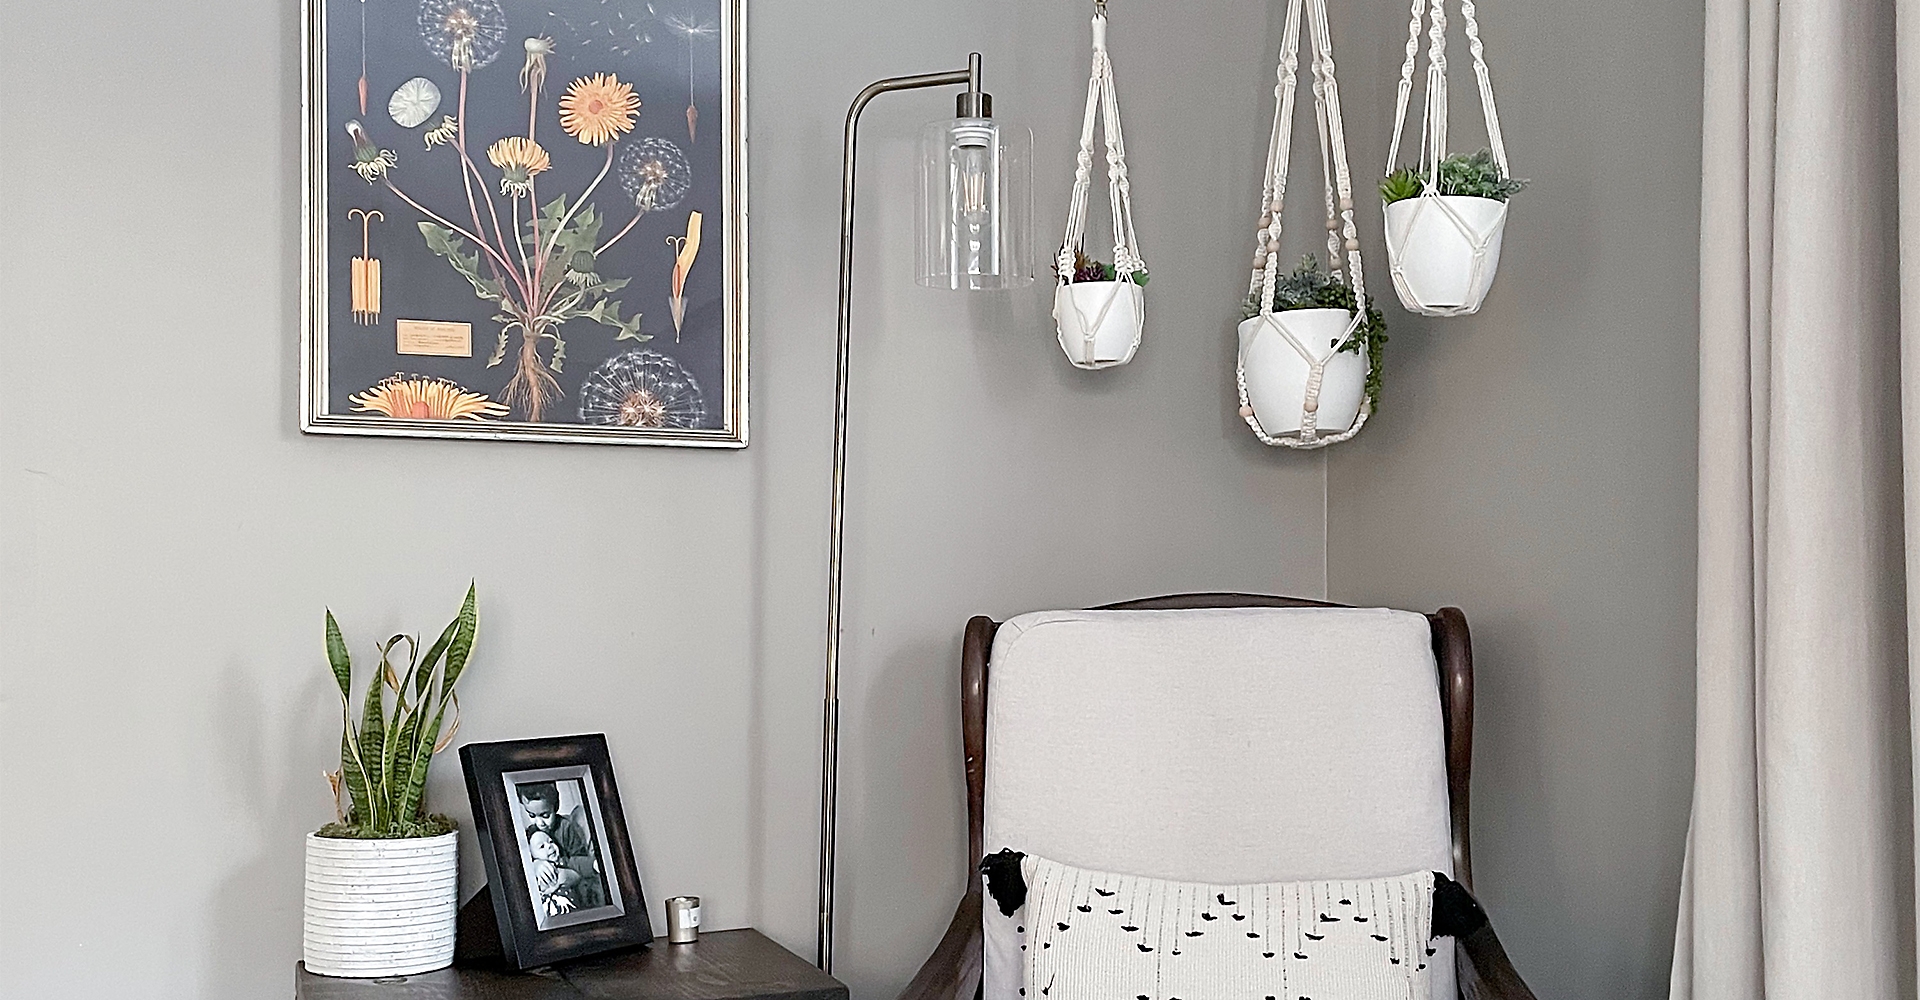
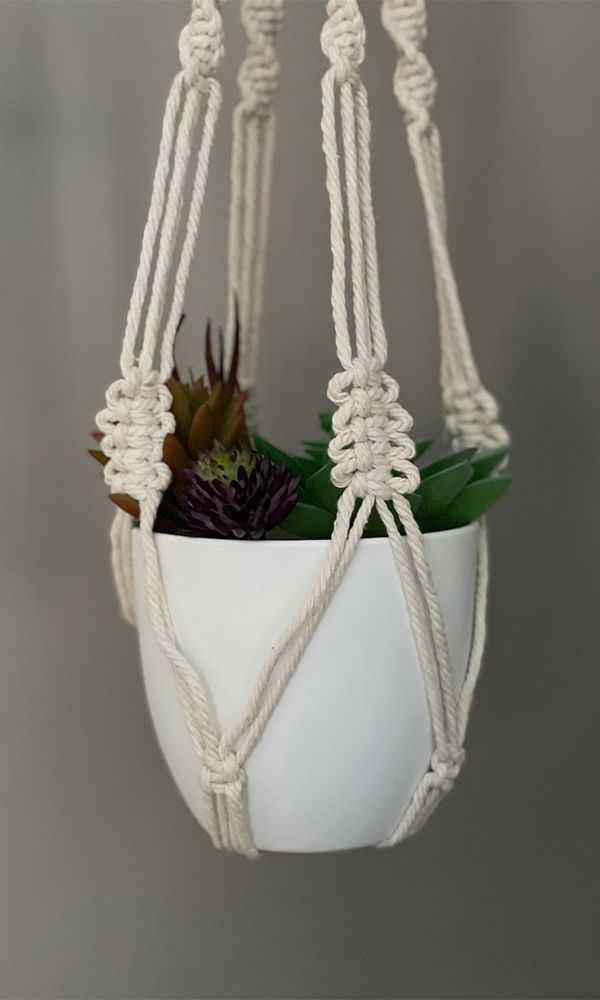
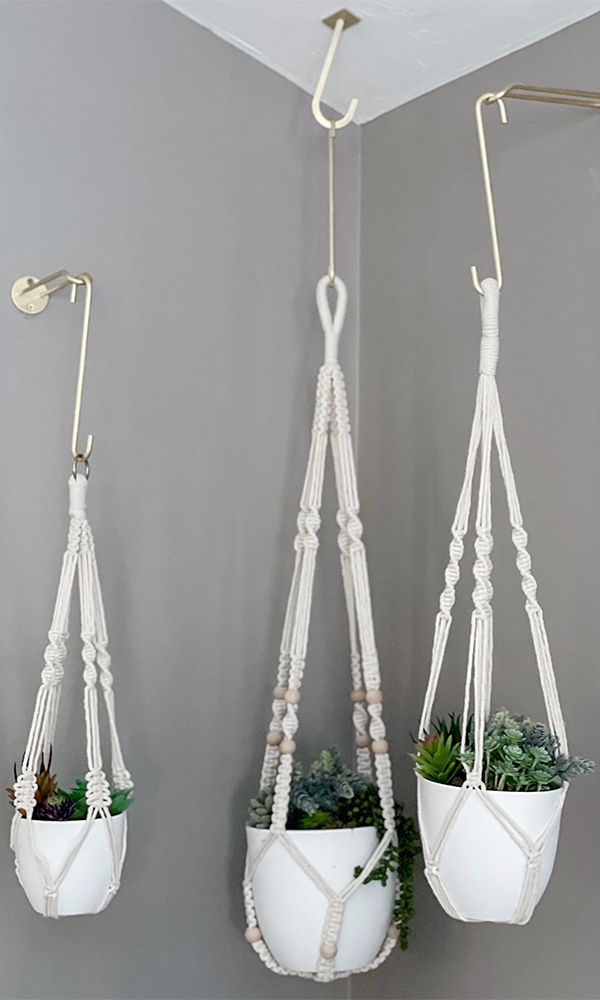
In a space like this, it’s the details that make all the difference. This space gets a bit of a boho sunroom type makeover using National Hardware’s gold brushed plant hardware, some macrame plant hangers, and faux plants! The hardware is beautiful and really easy to install. Once the location is selected, just screw the hardware into the wall or ceiling and add your hanging plants. It really doesn’t get any easier than that! Add a botanical print to the wall and then enjoy your new to you cozy-fied sitting area!
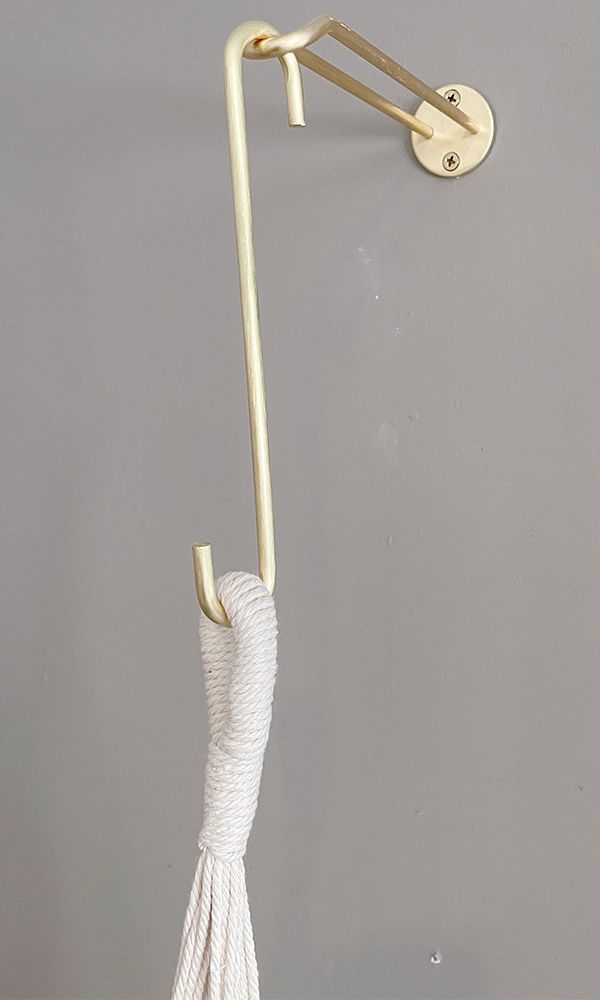
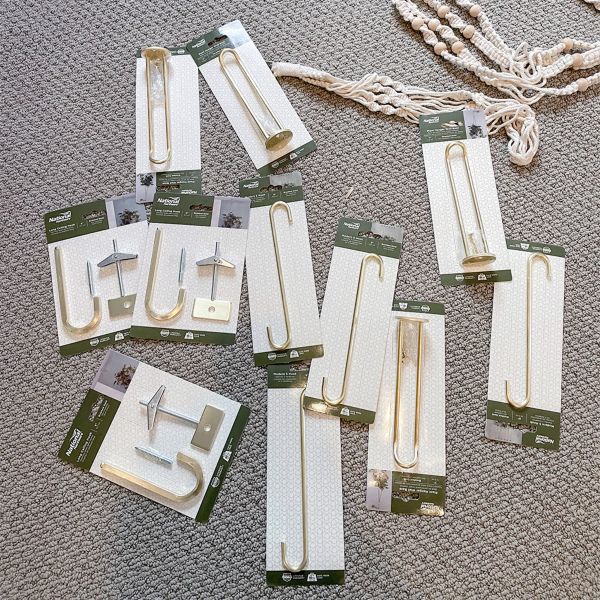
Hardware
- Tags:
- How To Projects
- Inspiration & Style Guides
- Weekend Warrior
- Bedrooms
- Home Offices
- Indoors
- Living Rooms
- Related Product Categories:
- Plant Hanging Brackets
- Plant Hanging Hardware
- Plant Hangers & Chains