
DIY Mirrored Closet Barn Doors
DIY this glamorous modern barn door project, inspired by National Hardware's Designer Premiere Kit! These mirrored sliding closet barn doors are big in style and make a fashionable statement with their mirrored finish!
Get Started
-
Difficulty:Expert
-
Team:2
-
Time:Over 6 Hours
Tools
-
Crescent Wrenches
-
Drill Bit
-
Drill
-
Level
-
Safety Goggles
-
Screw Drivers
-
Tape Measure


Step 1
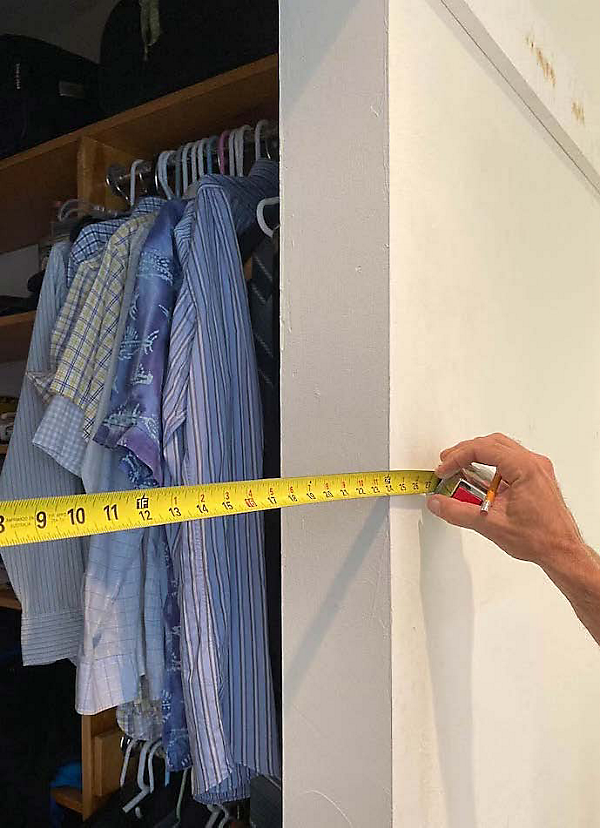
Take Measurements
The first step in building a barn door is to take measurements. You'll want your barn door to be slightly larger than the opening of the doorway. Be sure to have adequate clearance by measuring the adjacent wall. Doors must be able to open fully without objects in the way.
Step 2
Determine Your Style
Determine the style that you're going for and decide if you'll be able to build the door yourself or will modify a stock builder grade door.
Sliding Closet Barn Doors
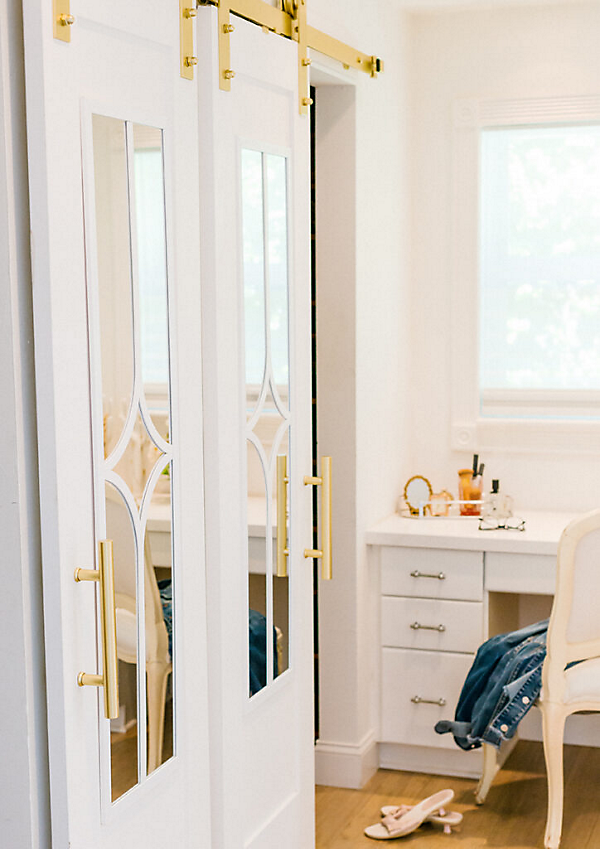
For this barn door project, two stock single panel interior wood doors were used. The doors will have mirrors added to utilize them in a bedroom closet area. To save time and money it's easy to use inexpensive wood framed dressing mirrors that are found at any home improvement center.
Sliding Closet Barn Doors
For this barn door project, two stock single panel interior wood doors were used. The doors will have mirrors added to utilize them in a bedroom closet area. To save time and money it's easy to use inexpensive wood framed dressing mirrors that are found at any home improvement center.

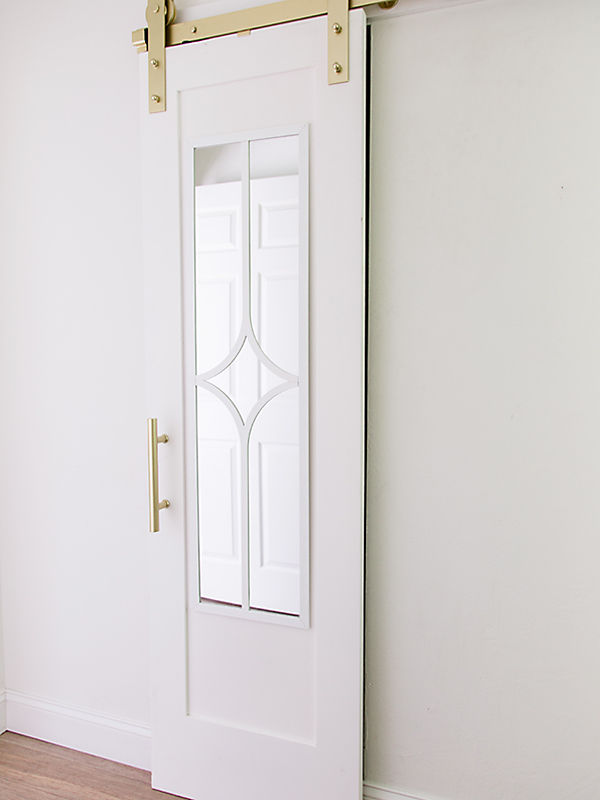
How to Add Mirrors to A Barn Door
Decide where the mirror will be placed on the door frame. You'll want to have the mirror at the correct height for seeing your full body reflection. Adjust height accordingly and for a pair of barn doors make sure to measure and mark to match. Then use small tack nails to attach the mirrors
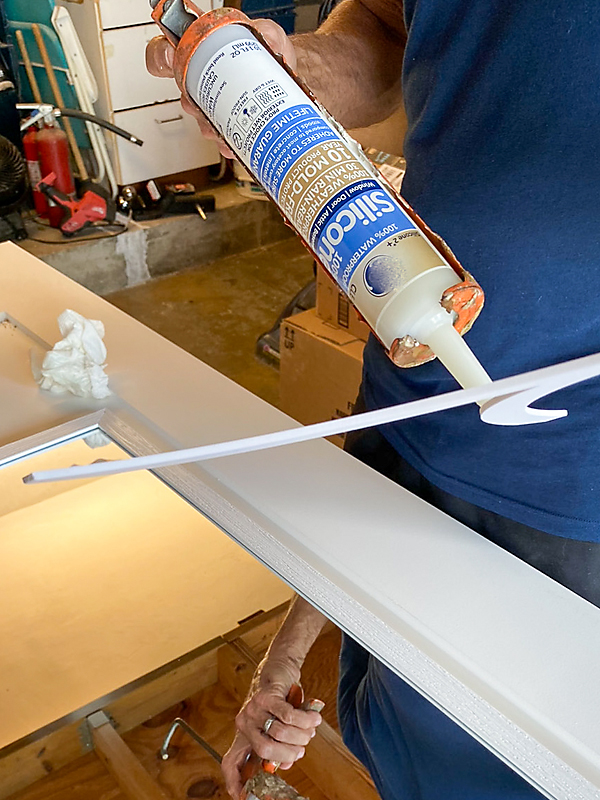
Barn Door Design Accents
You can dress up the mirror with premade furniture overlays or create your own design with thin wood molding strips. To adhere the overlays to the mirror, use a small amount of clear caulking and allow sufficient time to dry. Wipe any excess caulk with denatured alcohol or scrape off with a razor knife.
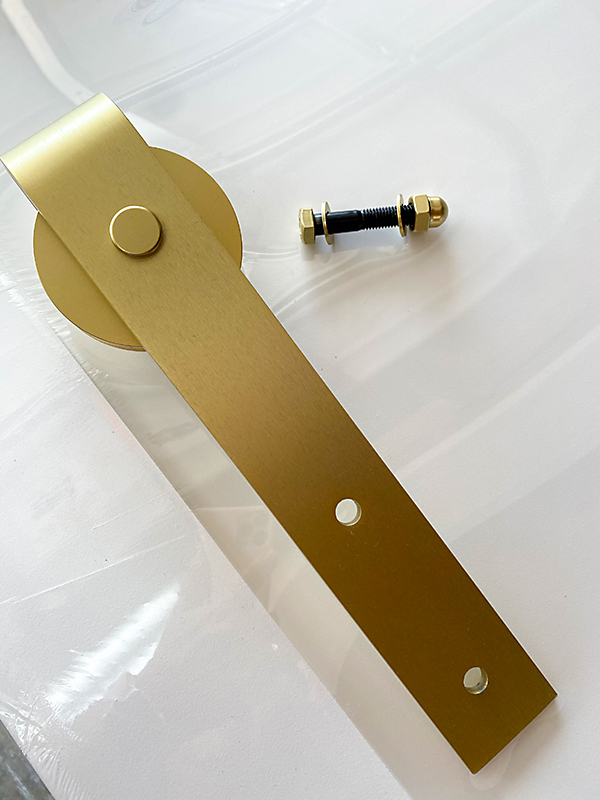
Step 3
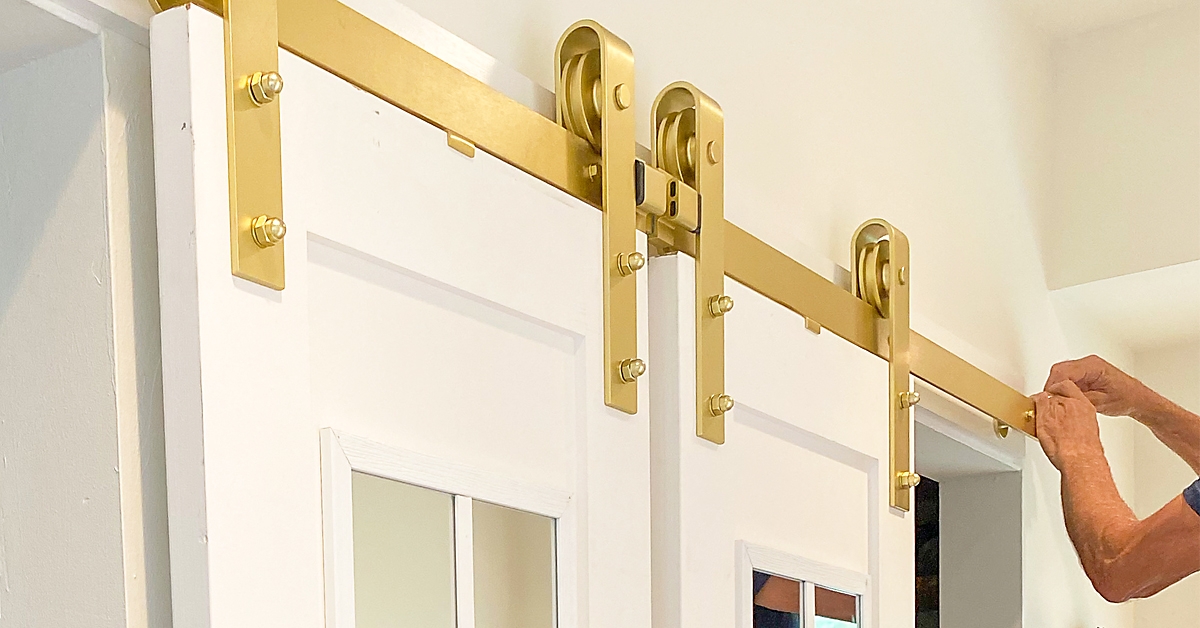
Attach the Hangers
You will attach the hangers that will be at the top and glide the doors along the track. Using the template supplied in the Barn Door Hardware Kit, mark where the hanger hardware holes should be on your door. Use a pencil and mark for the holes where the fasteners will attach the hangers to the door. Drill holes were marked and install the supplied fasteners on both the left and right tops of the front of the doors.
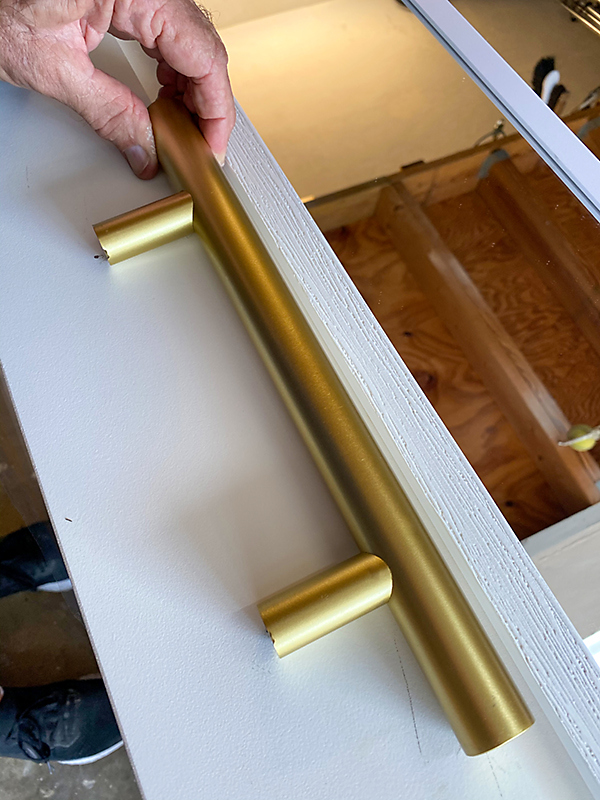
Step 4
Interior Design Made Easy
These beautiful Madison barn door pulls in brushed gold add a modern touch to the closet doors and coordinate with the rest of the barn door hardware and your home decor. Measure and determine where to place the handles and predrill for the hardware that is provided. Attach by screwing through the back of the doors.
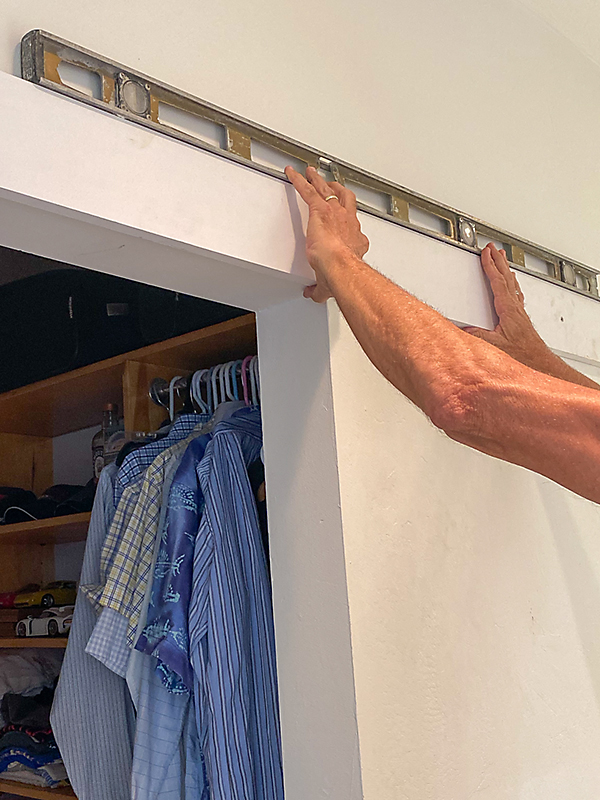
Step 5
How To Hang Barn Doors
First, screw a wood header board onto the top of the wall that you'll be mounting the sliding barn door track on. The board should measure approximately the length of the opening. This will not only give the board stability but will help move the door out away from the baseboard.
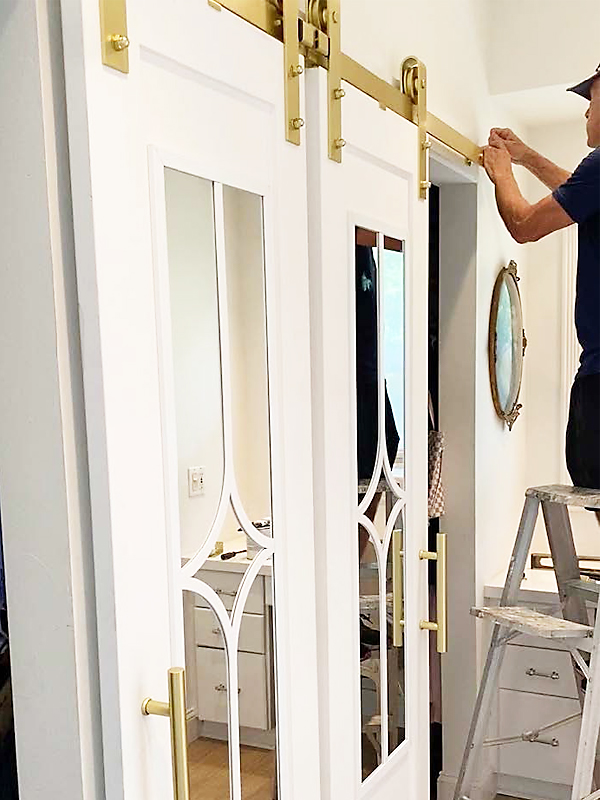
TIP: make sure that the header board is level!
Pre-drill the header for the supplied hardware to attach the rail to the wall and attach the header rail to the wall with a socket wrench.
Now grab a partner and hang your doors!
Step 6
Step back and enjoy your barn doors!
All parts and accessories are part of the National Hardware Barn Door Kits including an installation guide, end stops, a floor guide, and a soft close kit.
- Tags:
- How To Projects
- Bedrooms
- Closets

Janet Coon
Janet Coon is the face behind the popular design and DIY blog Shabbyfufu, now in it's 15th year of production!
Our Featured